
The Consumable That Decides Whether Your Baler Produces Bales or Excuses
The belts inside a variable-chamber round baler are the machine. Every kilogram of crop that becomes a round bale passes through the grip, compression, and rolling action of those belts. They flex around rollers thousands of times per hour, carry the tension of a forming bale, resist abrasion from stems and grit, and do all of this continuously across a season that may span hundreds of operating hours.
When belts are in good condition, the baler produces dense, uniform bales without operator attention. When belts are worn, cracked, or mismatched, bale quality falls before the operator notices the cause. Understanding belt construction, wear indicators, replacement timing, and installation procedure is not optional knowledge for anyone running a round baler seriously. This guide covers all of it in the sequence a working operator needs.
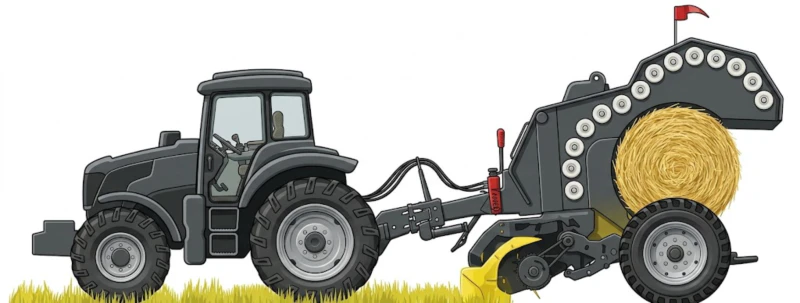
Variable-chamber round baler principle — belts wrap around the growing bale, maintaining tension and shape from first crop contact to full-size ejection
How Round Baler Belts Work: Construction, Load Path, and Why They Wear
A variable-chamber round baler uses four to eight continuous belts — depending on bale width and machine design — running in parallel across the full chamber width. Each belt forms a loop that passes over a series of fixed and movable rollers. As crop enters the chamber, the belts carry it through the initial rolling motion that forms the bale core. As the bale grows, the belt loop expands outward, maintaining contact pressure through spring-loaded or hydraulic tensioner rollers. By the time the bale reaches target diameter, each belt is under several kilonewtons of tension and flexing around rollers at several hundred cycles per minute.
Belt construction typically consists of three layers. The top face — the crop-contact surface — is a textured rubber compound, usually with a diamond, chevron, or rough-top pattern that provides grip on the crop material. The middle layer is a reinforcing fabric, typically polyester or aramid cord fabric laid in a bias-ply or straight-warp configuration. This layer carries the tensile load. The bottom face, which contacts the drive and guide rollers, is a smooth or lightly textured rubber compound designed for low rolling resistance and good tracking on the roller faces.
Wear accumulates from three sources simultaneously. Abrasion removes material from the crop-contact face each time rough stems or grit-contaminated crop material passes over it. Flexion fatigue cracks develop in the belt body at the highest-curvature roller contact points as the belt flexes millions of times across a season. And the belt splice or fastener — the mechanical join that makes the continuous loop — is a structural stress concentration that degrades faster than the belt body.
When to Replace: Seven Visual and Mechanical Indicators
Belt replacement timing is the most consequential maintenance decision on a variable-chamber round baler. Replacing too early wastes money. Replacing too late causes bale quality problems, belt failure mid-field, and potential damage to the roller bearings and drive shafts if a belt wraps or sheds a fastener inside the chamber. The following seven indicators, evaluated together, give a reliable picture of belt condition.
1. Top face rubber depth
New belts have 4 to 6 mm of rubber above the reinforcing fabric layer. Measure at three points across the belt width using a depth gauge or vernier caliper. When top face rubber measures below 2 mm at any point across the full belt length, replacement is due. Below 1.5 mm, the fabric layer is at risk of direct crop abrasion, which causes rapid structural failure.
2. Longitudinal cracking on the top face
Fine cracks running parallel to the belt length at roller flex points indicate rubber hardening from ozone exposure and heat cycling. Shallow surface cracks under 1 mm deep are cosmetic. Cracks that reach or expose the fabric reinforcement are a failure warning — water and grit entering the fabric layer accelerate delamination.
3. Edge fraying and cord exposure
Belt edges contact the side guide flanges on each roller. Fraying of 5 mm or more along either edge, or any visible cord fabric at the belt edge, indicates the belt has exceeded its service life. Edge damage also signals a tracking problem — inspect belt guides and tensioner alignment before fitting a new belt.
4. Splice or fastener condition
Mechanical clipper fasteners — the most common join type on aftermarket belts — have individual staple-style clips pressed through the belt ends. Inspect each clip across the full belt width. Any clip that is bent, cracked, or missing is a failure point. A fastener that separates inside the bale chamber can wrap around rollers and cause severe mechanical damage within seconds.
5. Belt elongation and tensioner bottoming
As belts stretch under repeated load, the tensioner rollers travel further from their center position to maintain belt tension. Check whether the tensioner arm is approaching the limit of its travel. A tensioner at 90 percent or more of its adjustment range indicates a stretched belt. Running with a bottomed tensioner produces inconsistent bale density and accelerates roller bearing wear.
6. Bale shape irregularity
A bale with one or more flat sides, or a consistently off-center bale that rolls unevenly after ejection, indicates uneven belt tension — typically one belt stretched significantly more than the others. This symptom appears before visual belt wear is obvious and is one of the most reliable early indicators that a set replacement is overdue.
7. Hours or bale count service life
Original equipment belts on quality round balers typically have a rated service life of 25,000 to 40,000 bales or 1,500 to 2,500 operating hours under normal conditions. Aftermarket belts range widely depending on fabric grade — from 15,000 to 35,000 bales. Track your bale counter from the date of last belt replacement and begin detailed inspections at 80 percent of the rated service life.
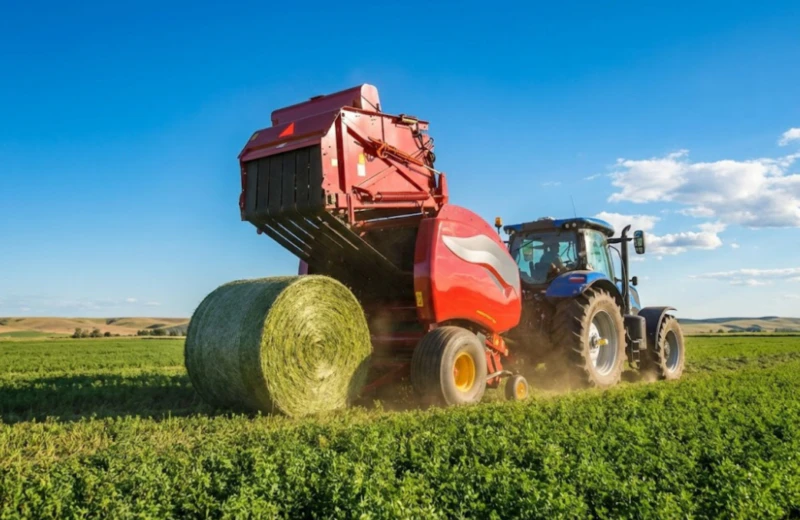
Variable-chamber round baler — the parallel belt set is the core mechanical system that determines bale density, shape, and consistency
Replace One Belt or the Full Set? The Case for Matched Replacement
The most common and most costly belt maintenance error is replacing only the belt that failed or showed visible damage while leaving the remaining belts in service. The logic seems reasonable — only one belt is visibly worn, so only one belt needs replacement. The mechanical reality is the opposite.
All belts in a baler run as a matched set under shared tension from the same tensioner system. A new belt placed alongside belts that have elongated through 20,000 bales of service will be shorter than its neighbors. The tensioner compensates for the average elongation of the set. The new belt runs tighter than the others, carrying a disproportionate share of the load, and wears to match the elongated belts within a few thousand bales. The result is that the new belt reaches the end of its service life at the same time as the old belts — but you have paid for it twice.
The correct approach is full set replacement whenever any belt in the set meets replacement criteria. The cost of a full set versus a single belt is typically three to six times higher depending on machine width, but it eliminates the labor cost of a second replacement within the same season, prevents bale quality degradation from mismatched belt tension, and protects roller bearings from uneven side loads.
| Replacement Approach | Upfront Cost | Labor Cost | Outcome |
|---|---|---|---|
| Single belt only | Low | 1x | Requires full set replacement within same season — total cost exceeds full set |
| Full set replacement | Medium | 1x | Uniform tension, consistent bale quality, maximum bale count per replacement cycle |
| Proactive full set at scheduled hours | Medium | 1x planned | Eliminates mid-season failure risk, enables pre-season scheduling at dealer |
OEM vs Aftermarket Belts: Specification Matching and What the Price Difference Buys
OEM belts from the machine manufacturer are produced to the same specification as the belts originally installed at the factory. They are dimensionally correct, use the same fabric grade and rubber compound, and are cut to the exact width with the edges finished to prevent fraying. The premium over aftermarket alternatives is typically 30 to 80 percent per belt depending on brand and machine model.
Quality aftermarket belts — produced by established belt manufacturers to OEM-equivalent specifications — offer comparable service life at lower cost. The key word is quality. The aftermarket belt market spans everything from genuine performance-grade alternatives to low-cost imports with inadequate fabric reinforcement and rubber compound that hardens and cracks within one season. Evaluating an aftermarket belt requires checking three things: fabric reinforcement type (polyester or aramid bias-ply is correct — woven fabric with random fiber orientation is not), rubber shore hardness specification (typically 65 to 72 Shore A for the crop-contact face), and the fastener system used (MATO or equivalent heavy-duty agricultural clipper fasteners only).
Width and length are the non-negotiable dimensional specifications. Belt width must match the roller face width exactly — a belt 5 mm narrower than specification tracks off the roller edge under load and damages the roller bearing seals. Belt length must match the tensioner travel range — a belt that is too long bottoms the tensioner before reaching operating tension, and a belt that is too short cannot be installed without exceeding the tensioner range.
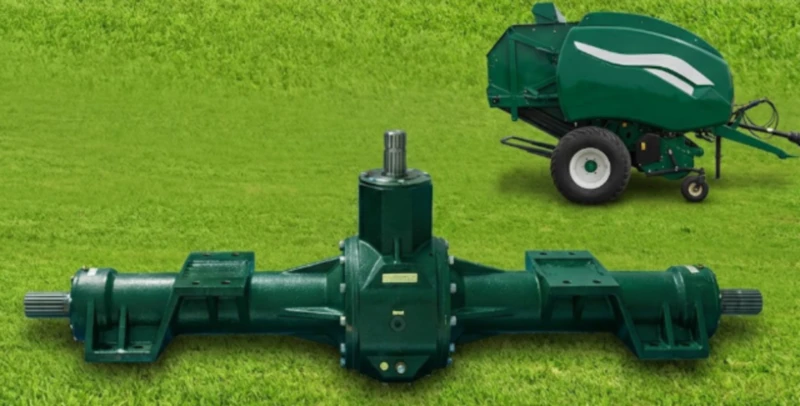
The baler gearbox drives all belt rollers simultaneously — roller bearing wear caused by mismatched or failed belts is the most expensive secondary consequence of delayed replacement
Compatible Belt Brands by Machine: A Practical Cross-Reference
Belt specifications vary significantly between baler manufacturers and between models within the same brand. The table below provides a general guide to belt width, count, and common aftermarket sources for widely used round baler families. Always confirm against your specific machine serial number and operators manual before ordering.
| Baler Brand / Series | Belt Count (typical) | Belt Width (typical) | Aftermarket Availability |
|---|---|---|---|
| New Holland BR / Roll-Belt series | 6 – 8 | 130 – 165 mm | Wide — most major suppliers stock |
| John Deere 5 / 6 series | 6 – 8 | 120 – 150 mm | Wide — confirm lacing hole spacing |
| Vermeer 504 / 604 / 705 series | 5 – 7 | 140 – 175 mm | Wide — note endless vs fastened options |
| CLAAS Rollant series | 6 | 130 mm | Good — Continental OEM equivalent common |
| Case IH RB / RB Flex series | 6 – 8 | 125 – 155 mm | Good — same platform as NH, many shared specs |
| Chinese-manufactured round balers | 4 – 6 | 100 – 140 mm | Source direct from manufacturer with machine model number for exact spec |
For Chinese-manufactured round balers, belt specifications are best confirmed directly with the manufacturer using the machine model number and gearbox housing casting number. Replacement belts are available direct from the factory or through authorized distributors and are typically priced significantly below European OEM equivalents while meeting the same dimensional and material specifications.
DIY Belt Replacement: Step-by-Step Procedure and What Can Go Wrong
Replacing round baler belts is within the capability of a mechanically competent operator with the right tools and a full afternoon. The job requires a belt lacing press or punch set, the correct clipper fastener size for your belt thickness, a pry bar or belt installation tool, and access to the operators manual for roller sequence and tensioner reset procedure. Allow four to six hours for a full set replacement on a first attempt.
Open the rear gate and secure it in the open position using the gate prop or locking pin specified in the manual. Never work inside the bale chamber with the gate held only by its hydraulic cylinder — cylinders can drift under load.
Release belt tension by collapsing the tensioner arm to its minimum position following the procedure in the manual — typically by releasing a hydraulic valve or manually releasing a spring-loaded latch. Mark the tensioner position before release so you can confirm full reset after installation.
Cut or unlace the old belts at the fastener. Do not attempt to reuse fasteners from worn belts — they have been through thousands of flex cycles and their clip fingers are fatigued. Dispose of old belts and fasteners immediately to prevent them from re-entering the baler as crop contamination.
Inspect all rollers before fitting new belts. Check each roller for flat spots, damaged surface finish, and bearing play. Spin each roller by hand — it should rotate freely with no resistance or grinding. A roller bearing that is beginning to fail will typically show a rough, grinding feel even under hand rotation. Replace any marginal roller bearing now, before the new belts are installed.
Route each new belt around the roller set following the exact path shown in the manual. Belt routing is model-specific and an incorrectly routed belt will track off-center immediately or twist under load. Attach the belt ends with new fasteners using the lacing press, ensuring fastener pins pass through both belt ends squarely and that the lacing hinge rod is seated fully in the clip eyes.
Reset the tensioner to the initial position. Close the rear gate and engage PTO at low tractor rpm — approximately 400 to 500 rpm — for two to three minutes with no crop entering the chamber. Observe belt tracking from a safe lateral position. Each belt should run centered on its rollers without drifting toward either edge. If any belt tracks off-center, stop immediately and check the fastener alignment and belt routing for that lane.
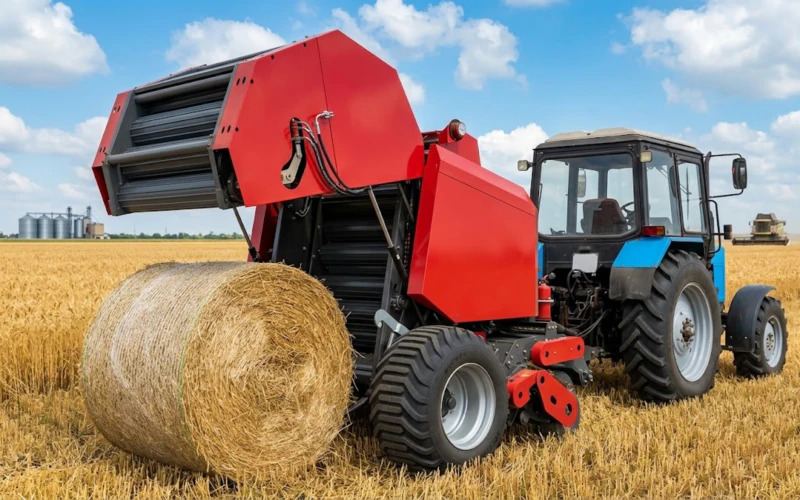
Field operation immediately after belt replacement — a tracked-belt check pass with no crop load confirms correct installation before the first bale of the new set
DIY vs Dealer Service: When Each Option Makes Sense
The decision between self-service and dealer service for belt replacement is primarily a question of time cost versus money cost, with an overlay of tooling availability and comfort with the specific machine.
| Factor | DIY | Dealer Service |
|---|---|---|
| Parts cost | Lower (direct sourcing) | Higher (dealer markup) |
| Labor cost | Own time only | USD 80 – 150/hr typical |
| Time to completion | 4 – 8 hrs first attempt, 2 – 3 hrs experienced | 1 – 2 hrs plus scheduling lead time |
| Tooling required | Lacing press, punch, pry bar | Dealer has all tools |
| Risk of installation error | Moderate on first attempt | Low |
| Suitable for | Operators with mechanical experience and time flexibility | High-output contractors where downtime cost exceeds labor cost |
The PTO shaft condition is worth checking before committing to either option. A worn PTO shaft introduces vibration that causes new belts to track unevenly from the first bale. Inspecting the shaft before belt replacement — and replacing it if worn — ensures the new belts start in the best possible condition. For machines with New Holland-compatible drive systems, a purpose-rated replacement PTO shaft is available and should be part of the pre-season service when belts are replaced.
Veelgestelde vragen
Conclusion: Belt Condition Is Baler Output — Treat It Accordingly
Round baler belts are not a background maintenance item. They are the primary mechanism through which every bale is formed, and their condition directly determines bale density, shape consistency, and the mechanical loads carried by every roller, bearing, and shaft in the chamber. An operator who tracks belt condition systematically, replaces the full set at the right time, and installs correctly will run fewer mid-season breakdowns, produce better bales, and extend the service life of every other component in the bale chamber.
If you are sourcing belts for a Chinese-manufactured round baler or evaluating a new machine where belt specification and availability are part of your purchase decision, contact our team at balershay.com for model-specific belt specifications and direct parts availability information.
Filed under: Round Baler Maintenance | Baler Belts | Baler Service Guide