
A complete maintenance guide for baler PTO shafts — covering daily lubrication, universal joint inspection, telescoping spline service, slip clutch adjustment, safety guard care, correct length specification, and when to replace rather than repair
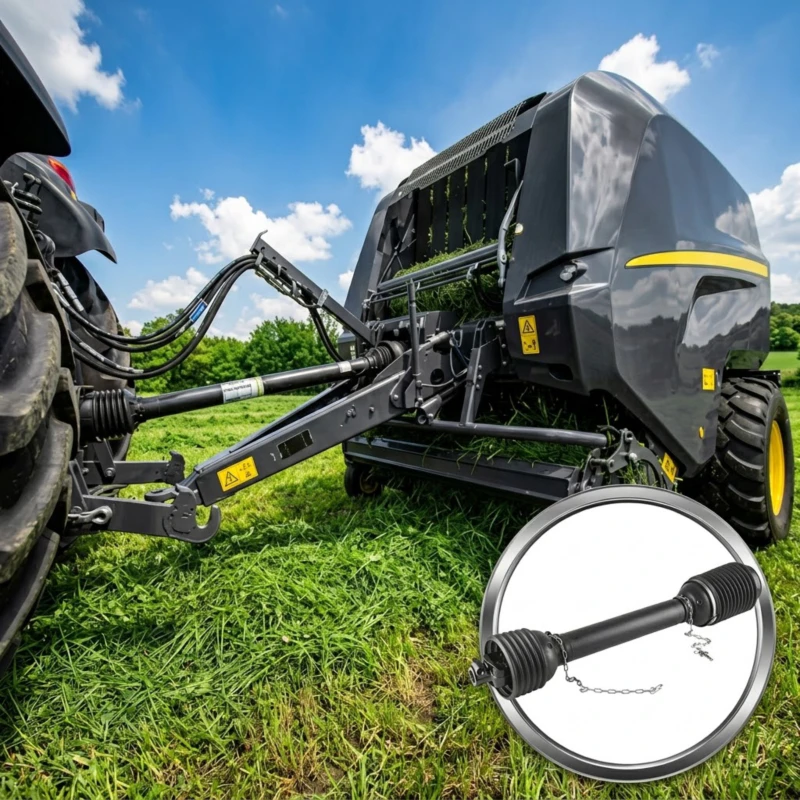
The PTO shaft between the tractor and the baler is one of the most heavily loaded components in the entire baling system, yet it is one of the least inspected. It transmits the full engine torque from the tractor to the baler at speeds of 540 or 1,000 rpm through universal joints that must accommodate the angle between the tractor PTO stub and the baler input shaft — an angle that changes continuously as the tractor turns and the baler follows on uneven ground. It must also absorb the sudden torque spikes that occur when the baler’s plunger meets a dense crop charge, or when the round baler chamber reaches peak density and the belt system stalls momentarily.
Despite these demands, PTO shaft maintenance is commonly neglected — either because the shaft is partially hidden under its safety guard and out of sight during normal inspection routines, or because operators assume that if it is spinning the machine it must be in acceptable condition. The consequences of this neglect pattern are well-documented: universal joint failures during peak harvest season when the shaft is under maximum load; telescoping spline seizure that prevents the shaft from compressing during tight turns; slip clutch wear that causes the clutch to engage at normal operating torque rather than only at overload events; and safety guard failures that expose rotating shafts to contact with bystanders or debris.
This article provides a complete practical maintenance guide for baler PTO shafts — covering every component, the correct service interval for each, the inspection technique that identifies developing problems before they become field failures, and the replacement decisions that prevent a season-ending breakdown during the most critical baling days of the year.
PTO Shaft Components: What Each Part Does and Why Each Part Fails
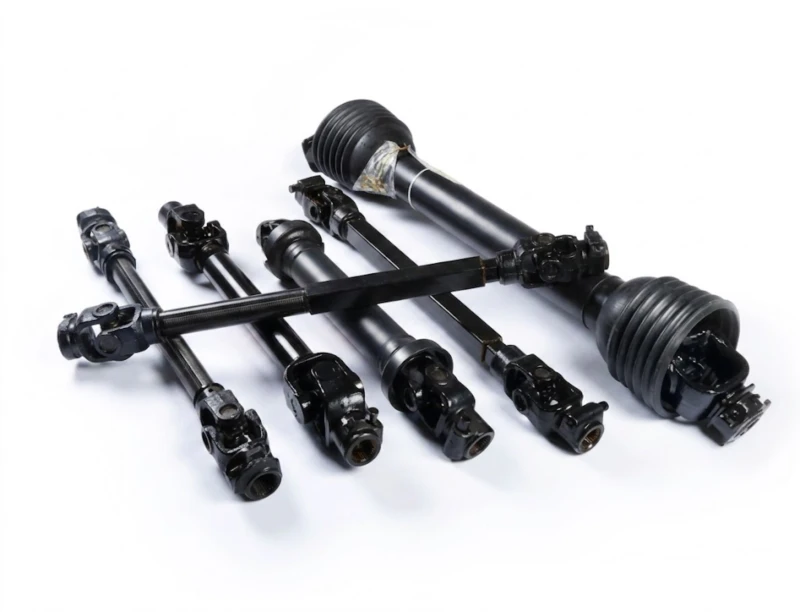
A baler PTO shaft assembly consists of four main functional components. Each has a distinct failure mode and a specific maintenance requirement. Understanding all four is the foundation of an effective maintenance programme.
1. Universal Joints (Cross-Pins)
The universal joints at each end of the shaft allow the driveline to transmit torque through the angle between the tractor PTO stub and the baler input shaft. Each joint contains a cross-shaped journal (the cross-pin or spider) with four needle roller bearings in cup housings pressed into the yoke arms.
Failure mode: Needle roller bearing fatigue from high-cycle loading; corrosion from inadequate lubrication; excess wear from operation above maximum joint angle.
2. Telescoping Spline (Inner/Outer Tube)
The telescoping section allows the shaft to change length as the baler moves in relation to the tractor during field operation — particularly during turns and when crossing uneven ground. It consists of an inner splined shaft sliding inside an outer splined tube, with a grease pocket between them.
Failure mode: Spline wear from inadequate lubrication; seizure from corrosion; noise and vibration from excessive spline clearance after wear.
3. Slip Clutch (Overload Protection)
The slip clutch is a torque-limiting device — typically a stack of friction discs clamped by springs — that allows the shaft to slip and interrupt torque transmission when the baler encounters a sudden overload event such as a dense crop slug, a blocked pickup, or a plunger jam. It protects both the baler’s mechanical components and the tractor’s PTO gearbox from destructive torque spikes.
Failure mode: Friction disc wear from frequent engagement; glazing from infrequent engagement; incorrect clamping force from spring fatigue or wrong adjustment.
4. Safety Guard (Plastic Shield)
The plastic safety guard covers the rotating shaft body and universal joints. It is stationary while the shaft rotates inside it, held by a chain or bracket at each end that prevents it rotating with the shaft. The guard’s function is to prevent contact between clothing, body parts, or field debris and the rotating shaft.
Failure mode: Cracking and breaking from UV degradation; contact damage from tight turns; guard seizing on shaft from missing end bearings.
Maintenance Schedule: Daily Checks, Seasonal Service, and Annual Overhaul
Daily In-Season Checks (5 Minutes)
Before starting the tractor each baling day, perform the following checks with the tractor engine off and the PTO disengaged:
- Grease all universal joint cross-pins: Apply 2–3 pumps of EP2 lithium grease to every grease nipple on the shaft — typically 4 nipples (one per cross-pin bearing cup on each joint). In dusty field conditions, grease daily without exception. Grease that has been contaminated by dust appears brown or grey at the nipple face — pump until fresh grease appears to confirm the bearing cavity has been purged of contaminated grease.
- Grease the telescoping spline: Most telescoping sections have a grease nipple on the outer tube near the compression end. Apply 3–4 pumps. If the spline has no grease nipple, separate the inner and outer sections at the manufacturer’s service interval and apply grease directly to the splines.
- Check universal joint play: Grip each yoke firmly and attempt to move it in the rotational direction — there should be no perceptible rotational play (backlash) in a serviceable joint. Any play above 2–3 degrees indicates needle roller bearing wear requiring replacement before it progresses to joint failure.
- Check safety guard rotation: With the tractor stopped, try to rotate the plastic guard shell by hand. It should rotate freely around the shaft — if it feels stiff or seized, the guard end bearings are worn or missing and the guard is at risk of rotating with the shaft, defeating its safety function.
- Visual check of guard condition: Look for cracks, splits, or sections broken from the guard body. A guard missing a section exposes the rotating shaft. Replace any guard with cracks through the full wall thickness or missing sections before operating the baler.
Mid-Season Check (Every 50–75 Operating Hours)
- Slip clutch inspection: Remove the slip clutch cover and visually inspect the friction disc faces. Measure disc thickness against the manufacturer’s minimum — discs worn to minimum must be replaced before the end of the season. Check that the clutch springs are all present and that none have compressed to coil-bind, which would prevent the clutch from slipping under overload.
- Joint angle check: With the baler hitched in its normal working position, measure the angle between the tractor PTO stub centreline and the baler input shaft centreline. This should be below 15 degrees in the straight-ahead working position. If the angle is above 15 degrees due to hitch geometry, the universal joints are working at above their rated angle and will wear faster — consider adjusting the baler’s drawbar height or the tractor’s three-point linkage to reduce the joint operating angle.
- Shaft length check: With the baler hitched in the working position and both tractor and baler on flat ground, measure the compressed length of the telescoping section. The inner tube must extend at least 150 mm into the outer tube in the fully compressed position (tractor turned to maximum steering angle); the inner tube must not be pulled to the end of its travel in the fully extended position (baler on uneven ground behind tractor). Both limits are safety-critical — the shaft going solid on a tight turn or pulling apart on uneven ground are field failure scenarios.
Pre-Season Overhaul (Annual)
Before each baling season, strip the PTO shaft completely. Remove the guard, separate the telescoping sections, and disassemble both universal joints. Inspect the cross-pin needle roller bearings for pitting, corrosion, and play. Replace both joints if either shows wear — replacing one joint while leaving a worn second joint simply shifts the failure point. Clean the spline surfaces of both inner and outer tubes, inspect for wear ridges and corrosion pitting, and repack with fresh grease before reassembly. Inspect all guard components for cracks and replace any damaged sections. Reassemble and confirm the shaft length is correct for the tractor-baler combination.
Slip Clutch Setting and Service: The Most Misunderstood Maintenance Item
How the Slip Clutch Should Work
A correctly set slip clutch should never engage during normal baling operation — not during a heavy swath, not at maximum chamber pressure, not during the bale completion phase of a round baler cycle. It should engage only when an abnormal event generates a torque spike above the normal operating envelope: a dense crop slug that exceeds the baler pickup’s capacity to feed smoothly, a foreign object entering the pickup, or a plunger jam on a square baler.
If the slip clutch engages frequently during normal baling, one of three things is wrong: the clutch engagement torque is set too low; the tractor is under-powered for the baler and density setting combination; or the baler is being operated at above its rated capacity for the current crop conditions.
Setting Slip Clutch Engagement Torque
Slip clutch engagement torque is typically set by adjusting the compression of the spring stack that clamps the friction discs. Most designs use a castellated nut or a series of bolts around the clutch circumference — tightening the adjustment increases the spring compression and raises the engagement torque; loosening reduces it. The correct engagement torque is specified by the baler manufacturer in the operator manual and is typically expressed in Newton-metres.
Without a torque-measuring test rig, the practical field check is to set the adjustment to the manufacturer’s specified position (number of exposed threads on the adjustment bolt, or gap dimension at the spring collar) and then observe whether the clutch engages under normal baling conditions. If it engages more than once per hour of normal baling, the setting may be too low or the clutch discs are worn and need replacement.
Glazed Friction Discs: The Silent Failure
A slip clutch that is never tested can develop glazed friction disc surfaces — a smooth, hardened layer on the disc faces that significantly increases the actual engagement torque above the designed setting. A glazed clutch may appear to be in good condition when inspected visually, but actually has an engagement torque two to three times higher than specified — meaning it will not slip even at torques well above the baler’s damage threshold. To test for glazing: set the tractor PTO to low speed (540 rpm), intentionally block the baler pickup with a handful of material, and engage the PTO. A correctly set clutch will slip immediately. A glazed clutch will not slip — the blocked pickup will stall the engine instead. If the engine stalls before the clutch slips, the discs are glazed and must be replaced, or the disc faces must be cleaned with fine abrasive paper to restore surface texture.
Correct Shaft Length and Installation: The Measurement That Prevents Two Failure Modes
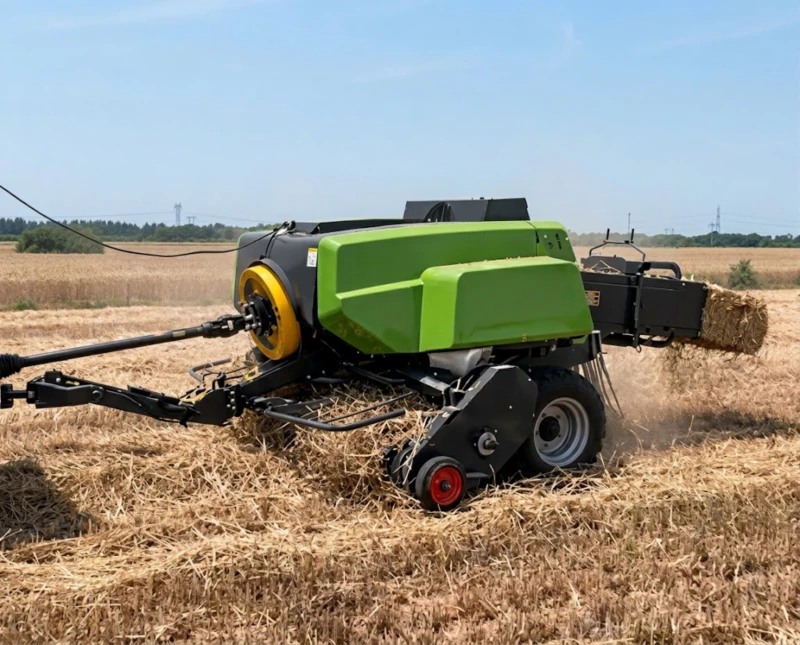
PTO shaft length is the most commonly incorrect specification in the baler-tractor connection, and it produces two opposite failure modes depending on which direction the error falls.
Too Short: Pull-Out Risk on Uneven Ground
A shaft that is too short for the tractor-baler combination will be at or near the limit of its telescoping travel in the straight-ahead working position. When the baler pitches down into a depression, the distance between the tractor PTO stub and the baler input shaft increases — and a shaft already near its maximum extension will pull the inner tube out of the outer tube completely, disconnecting the driveline and ejecting the inner shaft section. This is a serious safety incident and typically causes damage to the tractor’s PTO shaft end.
Too Long: Solid Stop on Tight Turns
A shaft that is too long will bottom out — the inner tube hits the closed end of the outer tube — when the tractor makes a tight headland turn. At the moment of bottoming out, the shaft becomes rigid and the full turning force of the tractor is transmitted through the PTO connection rather than accommodated by the telescoping section. This produces sudden impact loading on the universal joints, the tractor PTO gearbox, and the baler input shaft, and commonly causes the weakest link in this chain to fail. The failure is often a sheared universal joint cross-pin or a fractured tractor PTO stub — both expensive repairs at the worst possible time.
How to Measure Correct Shaft Length
- Hitch the baler to the tractor in its normal working position on flat ground.
- Measure the distance from the tractor PTO stub face to the baler input shaft face (the distance the shaft must bridge).
- The correct shaft collapsed length = this measurement minus 50–75 mm (to ensure the splines are engaged with at least 150 mm of overlap in the straight-ahead position).
- Turn the tractor to its maximum steering angle and confirm the shaft does not bottom out — the inner tube must not contact the closed end of the outer tube at any point in the turning arc.
- Drive across the most uneven ground in the field and confirm the shaft does not pull apart — the inner tube must remain engaged in the outer tube with at least 100 mm of spline contact at maximum extension.
Repair vs Replace: Decision Guide for PTO Shaft Components
Not every worn PTO shaft component justifies full shaft replacement. The following guide identifies which conditions warrant component repair or replacement versus full shaft replacement.
| Condition Observed | Action | Urgency |
|---|---|---|
| Universal joint play (2–5 degrees rotational backlash) | Replace both joint kits | Before next season |
| Universal joint play (above 5 degrees) or audible knock | Replace both joint kits immediately | Do not operate |
| Telescoping spline stiff but not seized | Clean, regrease, confirm movement | Before baling |
| Telescoping spline seized (will not slide) | Replace shaft assembly | Do not operate |
| Slip clutch engaging at normal operating torque | Inspect discs; adjust or replace | Before next use |
| Slip clutch glazed (will not slip at overload) | Clean or replace friction discs | Before next use |
| Safety guard cracked but complete | Replace guard section | Before next season |
| Safety guard missing section(s) | Replace guard immediately | Do not operate |
| Shaft 2–3 seasons old, heavy commercial use | Replace full shaft assembly | Pre-season |
| Shaft length incorrect for tractor-baler combination | Order correct-length shaft | Before operating |
سوالات متداول
How often should I replace PTO shaft universal joints on a commercially used baler?
For a baler used commercially for 60–90 productive days per season, universal joint replacement every 2–3 seasons is the appropriate planned maintenance interval, regardless of apparent condition. Universal joint needle roller bearings fatigue cyclically — the failure mechanism is not gradual wear but fatigue crack propagation in the bearing races, which can produce sudden failure with little warning once the fatigue crack reaches critical size. A joint that checked out with minimal play in the pre-season inspection can fail mid-season if fatigue has progressed since the last inspection. The cost of a replacement joint kit is modest relative to the cost of a mid-season field failure and the consequent lost baling days. Budget universal joint replacement as a planned consumable cost on a fixed cycle rather than waiting for play to develop.
What type of grease should I use on PTO shaft universal joints?
Use EP2 (Extreme Pressure, NLGI grade 2) lithium-based grease for universal joint lubrication. The EP additive package in EP2 grease provides anti-wear protection under the high contact pressure in the needle roller bearing cups, which standard lithium grease does not provide adequately at PTO shaft torque levels. Molybdenum disulphide (moly) grease is an acceptable alternative and provides additional extreme-pressure protection — it is particularly useful in high-torque large square baler applications. Do not use general-purpose wheel bearing grease — it typically lacks the EP additives required for universal joint service and will be expelled from the bearing cups faster than EP2 under the centrifugal forces of 540 or 1,000 rpm rotation. Confirm the grease type with the shaft manufacturer’s specification in the maintenance manual.
Is it safe to operate the baler with the PTO safety guard removed for cleaning or adjustment?
No — never operate the baler with the PTO shaft safety guard removed or damaged. The rotating PTO shaft is one of the most dangerous components on a farm — at 540 rpm, a complete wrap around the shaft takes approximately 50 milliseconds, which is faster than the human reflex response time. Entanglement with a rotating PTO shaft is typically fatal or results in severe permanent injury. All cleaning and adjustment work on or near the PTO shaft must be performed with the tractor engine stopped and the PTO completely disengaged. If the guard must be removed for maintenance access, replace it fully before starting the tractor and never rely on “watching where you are” as a substitute for the guard. Agricultural safety records in every country document regular fatalities from rotating PTO shaft entanglement — the guard is not optional equipment.
Can I use a PTO shaft from a different implement on my baler if the connection sizes match?
Connection size matching (spline type and PTO speed) is necessary but not sufficient for safe PTO shaft substitution. A replacement PTO shaft must also be rated for the peak torque of the baler application, be the correct length for the tractor-baler combination, and have its slip clutch set to the baler manufacturer’s specified engagement torque — not the engagement torque of the original implement it came from. A shaft from a lighter-duty implement (a mower or tedder, for example) transferred to a large square baler will have universal joints, splines, and a slip clutch rated for significantly lower torque than the baler requires — it will fail under normal baling load. Always specify a replacement shaft by the baler model and the tractor PTO specification, not just by the connection dimensions.
Conclusion: Five Minutes a Day Prevents Five Days of Lost Harvest
The PTO shaft maintenance programme described in this article requires five minutes per baling day, a full pre-season strip and inspection, and a planned replacement budget for universal joints and slip clutch discs every two to three seasons. This investment is small relative to the cost of what it prevents: a mid-season shaft failure during peak harvest that stops the baling operation for days while parts are sourced, a seized telescoping section that causes a tight-turn shaft failure, or a glazed slip clutch that allows baler damage when the overload protection it is supposed to provide fails to engage.
The PTO shaft is the single component through which all tractor power must pass to reach the baler. Its condition determines whether that power is delivered reliably through the entire harvest season or interrupted at the worst possible moment. A shaft that is inspected, greased, and replaced on a planned schedule before it fails is the lowest-cost component in the baling system. A shaft that fails in the field during peak harvest is, by any measure, the most expensive.
Replacement PTO Shafts and Baler Driveline Components — Balershay
We supply replacement PTO shafts, universal joint kits, and slip clutch components matched to our full range of round balers and large square balers — from mini round baler shafts for 25–50 hp tractors to heavy-duty 1,000 rpm assemblies for the EP-9YFQ-2290XD. Visit balershay.com or contact our team to confirm the correct shaft specification for your tractor and baler combination.