
From mowing to fermentation: how to cut, wilt, bale, and wrap high-moisture grass and legumes into round bale silage that retains energy, protein, and palatability through the feed-out season
Round bale silage — sometimes called baleage, haylage, or wrapped silage — is one of the most practical forage conservation methods available to livestock farms of any size. Unlike clamp silage, which requires significant capital investment in bunker infrastructure, heavy machinery for filling and rolling, and a minimum field scale to be economical, round bale silage can be produced with a modest tractor, a round baler, and a bale wrapper. The result is a fermented, high-energy forage that retains the feed value of the standing crop far better than field-dried hay — particularly in the unpredictable weather windows that make consistent hay-making difficult in temperate and humid climates.
The quality of the silage produced, however, depends on a precise sequence of decisions and timing from the moment the mower goes into the field to the moment the bale is sealed. A short wilt to the right moisture level, baling at the correct density, wrapping within the critical time window, and handling the bales without puncturing the film — each step either preserves the fermentation conditions that produce high-quality silage or creates the aerobic spoilage that produces the heating, mould, and effluent losses that make round bale silage the topic of disappointed farmers’ conversations every spring.
This guide covers every step in the round bale silage production process with the specific management decisions and target parameters that determine whether the resulting silage is a high-value winter feed or a disappointing pile of spoiled material.
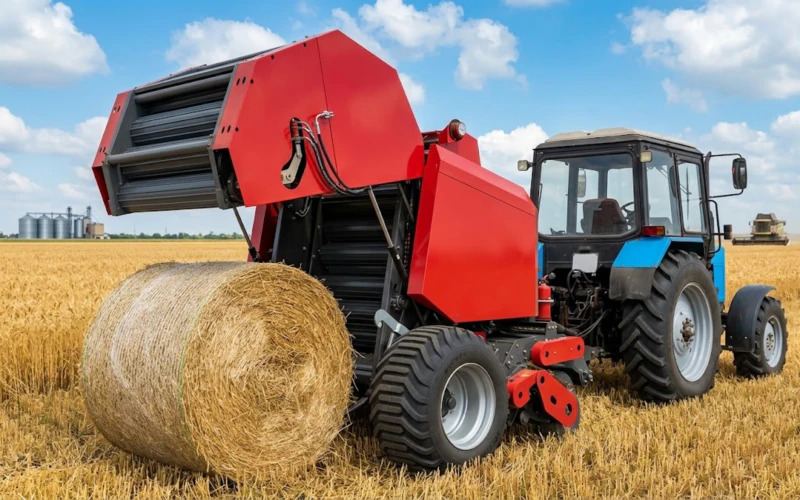
The Science of Silage Fermentation: What Makes Good Silage and What Goes Wrong
Understanding the fermentation process that occurs inside a wrapped bale is the foundation of every management decision in round bale silage production. Silage is not simply wet grass in a bag — it is a controlled anaerobic fermentation product in which lactic acid bacteria (LAB) convert crop sugars to lactic acid, reducing the pH of the forage to below 4.5 and creating an acidic environment that inhibits the growth of spoilage organisms.
Phase 1: Aerobic (0–24 hours)
Immediately after wrapping, residual oxygen in the bale is consumed by plant respiration and aerobic bacteria. This phase produces heat and CO₂. The goal is to minimise its duration by baling at high density (reducing inter-stem air pockets) and applying film rapidly (limiting new oxygen entry). Every hour of aerobic activity consumes crop sugars needed for lactic acid production.
Phase 2: Lactic Acid Fermentation (Days 1–21)
Once oxygen is exhausted, LAB dominate and convert water-soluble carbohydrates (WSC) to lactic acid. pH drops from approximately 6.0 to below 4.5 over 2–3 weeks. This is the critical phase — high WSC content in the crop and adequate moisture (above 40%) are essential for rapid pH drop. Slow pH drop allows secondary fermentation organisms (Clostridia, Listeria) to compete before pH reaches the safe zone.
Phase 3: Stable Storage (Weeks 3–Months)
Below pH 4.5, microbial activity effectively ceases and the silage enters stable storage. Nutritive value is preserved from this point until the bale is opened. A well-fermented round bale silage retains 90–95% of the original dry matter and 85–95% of the original metabolisable energy — significantly better than field-dried hay in a wet season.
What Goes Wrong: Aerobic Spoilage
Film puncture at any point — during wrapping, handling, storage, or from birds and rodents — admits oxygen and restarts aerobic microbial activity. Yeasts and moulds proliferate, consuming lactic acid and raising pH. The bale heats, loses dry matter, and produces the characteristic blue-grey mould visible when a spoiled bale is opened. A single 5 cm film puncture can spoil 15–25% of a bale’s volume.
Step-by-Step: From Mowing to Wrapped Bale
Step 1 — Mowing: Timing and Cut Height
When to cut: For grass silage, cut at early heading stage — when the grass is approximately 30–40 cm tall and before seed heads fully emerge. At this stage, WSC content is high and fibre content is lower than in mature grass, producing silage with high digestibility and energy density. For legumes (clover, alfalfa), cut at early to mid-flower stage. Cutting too late (mature, seeded grass) produces silage with high fibre, low WSC, and poor fermentation characteristics.
Cut height: Set mower cut height to 50–75 mm above soil surface. Lower cuts maximise yield per pass but risk soil contamination of the cut swathe — soil contains Clostridial bacteria and buffers the crop against pH drop, both of which impair fermentation quality. At 75 mm, the lower stems left as stubble also re-grow more vigorously for the next cut.
Conditioning: Use a mower conditioner (roller or tine type) where available. Conditioning breaks the stem cuticle, allowing moisture to escape 30–40% faster during wilting — reducing the wilt period and the weather exposure window significantly.
Step 2 — Wilting: The Critical Moisture Window
Target moisture content: The ideal moisture range for round bale silage is 40–65% moisture (35–60% dry matter). Above 65% moisture, the bale produces excessive effluent during fermentation (nutrient loss and environmental risk), the bale is very heavy and difficult to handle, and the film is under greater pressure from the wet, dense crop. Below 40% moisture, fermentation is slow and incomplete — the LAB cannot proliferate rapidly enough in low-moisture material, and the silage risks heating rather than fermenting.
Wilt period: In good drying conditions (sun, wind, low humidity), a 24–48 hour wilt from fresh-cut grass typically achieves the target moisture range. In cool, humid, or overcast conditions, 48–72 hours may be required. Check moisture with a quick-dry oven or a commercial moisture meter on a representative handful of material from the windrow at baling height.
The squeeze test: A reliable field test — take a tight handful of the wilted crop and squeeze firmly for 30 seconds. If juice runs freely between the fingers, moisture is above 75% — too wet. If no juice appears but the material feels moist and cool, moisture is in the target zone. If the material feels dry and crumbly, it is below 40% — too dry for good silage fermentation.
Step 3 — Baling: Density, Tying, and Speed
Bale density: Set chamber pressure to the maximum appropriate for the crop moisture and baler specification. High-density bales have less inter-stem air space, which shortens the aerobic phase and accelerates the transition to anaerobic fermentation. A well-packed silage bale should feel firm and resist hand pressure at the bale face — not spongy or yielding.
Net wrap for silage: Use net wrap rather than twine for silage bales. Net wrap applies in 1–2 passes and produces a tight, smooth bale surface that the stretch film adheres to without air pockets between the film and the crop. Twine-wrapped bales have channels along each twine band where the film cannot contact the crop — these channels harbour air and become mould initiation sites. Apply 2 layers of net wrap minimum for silage bales.
Baling speed: Maintain a consistent forward speed that keeps the bale chamber filling uniformly. Erratic speed produces bales with uneven density — loose zones in the bale interior where aerobic activity continues longer than the dense zones. Match forward speed to swath volume: reduce speed in heavy swaths, increase in thin windrows.
Step 4 — Wrapping: Film Layers, Speed, and the Two-Hour Rule
The two-hour rule: Wrap each bale within two hours of leaving the baler — ideally within one hour. Every hour of delay allows the aerobic phase to continue consuming sugars. In warm weather, the aerobic phase heats the bale surface, and a bale that is noticeably warm to the touch before wrapping has already lost a significant proportion of its fermentable sugar. In cool, overcast conditions the two-hour window is less critical but should still be the working target.
Film layers: Apply minimum 4 layers of 25-micron stretch film (or 6 layers of 20-micron film) for standard round bale silage in normal storage conditions. In areas with high UV exposure, bird pressure, or extended storage (beyond 6 months), increase to 6 layers of 25-micron film. More film layers provide more redundancy against minor punctures — a single pin-hole through 4 layers may not reach the crop; through 2 layers, it almost certainly does.
Overlap: Each film spiral should overlap the previous by 50% of the film width. Less overlap produces thin zones between spiral passes where two-layer protection drops to one-layer. Maintain consistent wrapping tension throughout — loose wrapping produces a film that does not conform tightly to the bale surface and traps air underneath.
Equipment Setup: Baler, Wrapper, and PTO Shaft Specification
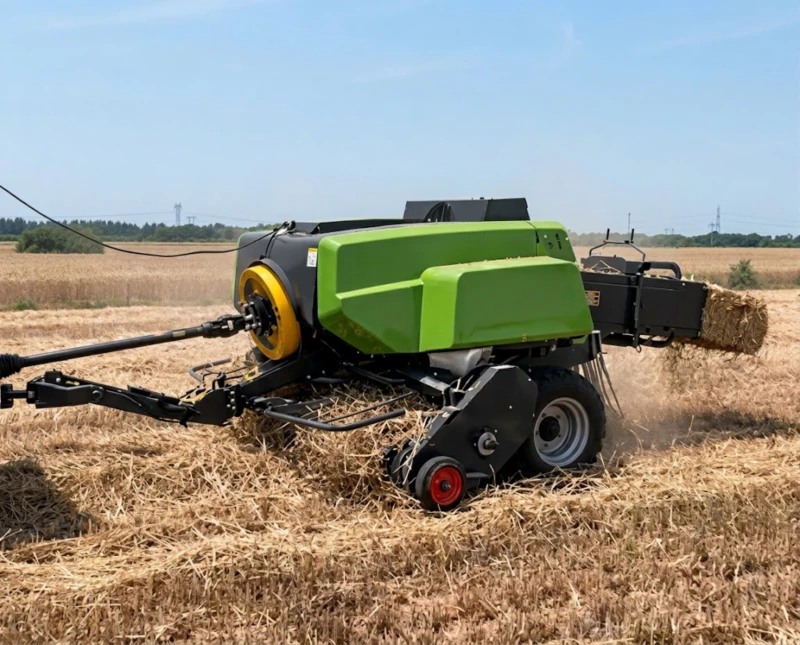
For round bale silage production, the baler and wrapper are typically operated as a two-machine system — the baler working ahead in the field while the wrapper operates at the bale collection point, or as an integrated bale-and-wrap combination unit where both operations occur in a single pass. Both configurations place specific demands on the PTO shaft connecting the tractor to the baler.
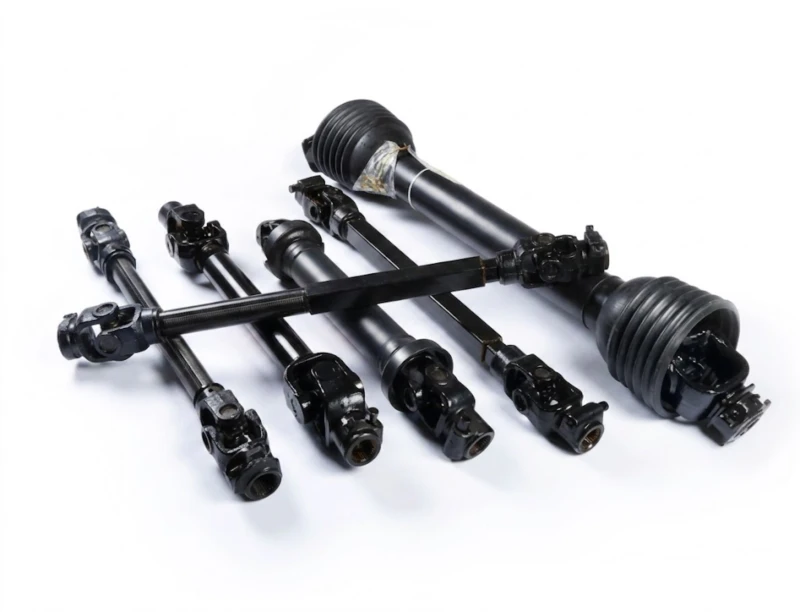
Silage baling at high moisture content produces a heavier, denser bale than dry hay baling of the same volume. The increased bale weight means the chamber pressure at full bale density is higher, and the torque demand on the PTO during the final compression and wrapping cycle is greater than for dry hay operation. A Zapfwelle that is at the borderline of its rated torque capacity for dry hay operation may be overloaded during silage baling at the same tractor speed and chamber pressure setting. Specify a shaft rated above the baler’s maximum torque demand, not at the expected average.
The wrapping machine — whether a separate bale wrapper or an integrated unit — also draws PTO power for the rotating table or satellite arm that applies the film. On a standard separate bale wrapper, the PTO demand is modest (10–20 hp); on a large combination bale-and-wrap machine, the combined PTO demand approaches that of the baler alone. Confirm the tractor has sufficient PTO output for the combined demand before selecting an integrated system.
Before the silage season, inspect the PTO shaft for universal joint play, telescoping spline lubrication, and guard integrity. A shaft failure during silage baling — particularly if it occurs on a warm day when the two-hour wrapping window is already critical — can result in bales that cannot be wrapped in time, losing the fermentation window and converting a day’s baling into low-quality spoiled material.
Storage, Handling, and Feed-Out: Protecting Quality from Field to Feeder
Storage Site Selection
Place wrapped bales on a well-drained, relatively flat surface — a slight slope is acceptable but avoid hollows where water pools around bale bases. Prolonged water contact softens the film and increases puncture risk from ground contact. A clean, firm surface (stubble field, grazed-out paddock, gravel pad) is preferable to rough ploughed ground where surface irregularities cause film abrasion.
Position bales end-to-end in continuous rows with bale faces touching, rather than in isolated individual positions. End-touching reduces the exposed film area per bale (the cylindrical side is the most vulnerable surface; flat ends touching each other are protected) and deters birds from landing between bales and pecking at the film.
Bird and Rodent Film Protection
Bird and rodent film puncture is the most common cause of aerobic spoilage in stored round bale silage. Crows, rooks, and magpies peck at white or light-coloured film; dark green or black film is less attractive to birds but not immune. In high-pressure areas, apply a light coat of lime wash or proprietary bird deterrent spray over the bale film surface. Regularly walk stored bales and repair any puncture immediately with silage repair tape — do not leave a puncture unsealed even for one day in warm weather.
Minimum Storage Period Before Feed-Out
Allow a minimum of 6–8 weeks from wrapping before opening any bale for feed-out. Fermentation is typically complete by 3–4 weeks, but the additional time allows the silage pH to fully stabilise and the temperature to equalise with the ambient environment. Opening a bale before fermentation is complete exposes incompletely stabilised material to oxygen, producing rapid heating and Clostridial growth in the opened face.
Feed-Out Rate
Once a bale is opened, feed out the entire bale within 3–5 days in cool weather, or within 1–2 days in warm conditions (above 15°C). The exposed face re-starts aerobic spoilage immediately on film removal — the faster the bale is consumed, the lower the feed-out losses. Avoid leaving a half-eaten bale in a ring feeder for more than 48 hours in summer conditions.
Quality Targets and Troubleshooting Common Problems
Use the following targets and problem indicators to assess your silage quality and identify where the production process needs adjustment.
| Parameter | Good Silage Target | Concern Range | If Outside Target |
|---|---|---|---|
| pH at feed-out | 3.8–4.5 | Above 5.0 | Poor fermentation — review wilt moisture and baling density |
| Smell | Sharp, acidic, fruity | Butyric (rancid butter) | Clostridial fermentation — crop too wet or soil contamination |
| Temperature at opening | Ambient ±2°C | Above ambient +5°C | Film puncture / aerobic spoilage active |
| Colour | Olive green to dark green | Black, grey-blue, or white patches | Mould from aerobic spoilage — film failure or excessive DM |
| Dry matter at feed-out | 35–55% | Below 30% or above 60% | Adjust wilt period at next cutting |
Häufig gestellte Fragen
How many layers of stretch film do round bale silage bales need?
The minimum recommendation is 4 layers of 25-micron stretch film for standard storage conditions. In areas with high bird pressure, high UV exposure, or planned storage beyond 6 months, 6 layers of 25-micron film provides significantly better puncture redundancy. With 20-micron film, increase to 6 layers as standard. The economics are clear: an extra two layers of film costs pennies per bale; a spoiled bale represents the total loss of the feed value stored in it. Never reduce film layers to save cost — the saving is trivial against the potential loss.
Can alfalfa be made into round bale silage?
Yes, but alfalfa (lucerne) presents a more challenging silage fermentation than grass because of its high protein and low water-soluble carbohydrate content. High protein buffers the pH drop, meaning alfalfa silage requires more lactic acid production to reach the target pH — which in turn requires a higher initial WSC content (difficult in mature alfalfa) or the use of a lactic acid bacteria inoculant to accelerate fermentation. Wilt alfalfa to 40–50% moisture (slightly drier than grass silage) before baling, apply a proven LAB inoculant at baling, use minimum 6 layers of film, and allow a minimum of 8 weeks fermentation before opening. Alfalfa silage made correctly is a very high-energy, high-protein forage; made incorrectly it produces a butyric, unpalatable product that animals will reject.
What is the difference between silage inoculants and when should I use one?
Silage inoculants are preparations of lactic acid bacteria (LAB) — typically Lactobacillus plantarum and related species — applied to the crop at baling to boost the population of beneficial fermentation bacteria beyond the natural epiphytic population on the crop surface. They are most valuable in three situations: crops with naturally low epiphytic LAB populations (mature grasses, legumes, second-cut material after a dry spring); crops that have been rained on after cutting (which leaches WSC and reduces the available fermentation substrate); and crops with high buffering capacity (legumes, immature grass with high protein). For high-sugar first-cut grass in good wilting conditions, a natural fermentation without inoculant is often entirely adequate. In difficult conditions, a proven inoculant provides meaningful insurance against poor fermentation quality.
My silage smells strongly of vinegar rather than sharp and fruity. What does this indicate?
A strong vinegar smell (acetic acid rather than lactic acid) indicates a fermentation that was dominated by heterofermentative bacteria or Acetobacter rather than the preferred homofermentative LAB. This typically results from: crop that was too dry at baling (allowing acetic acid producers to dominate before moisture-dependent LAB could establish); excessive air entrapped in a loosely-baled or poorly-wrapped bale; or delayed wrapping that allowed an extended aerobic phase. Acetic acid silage is generally safe to feed and retains reasonable nutritive value, but it has lower lactic acid content than optimal silage and a pH that may not be sufficiently stable for long storage. For the next batch, focus on baling at 45–55% moisture, maximising bale density, and reducing the interval between baling and wrapping.
Conclusion: The Difference Between Good and Poor Silage Is Made in the Field, Not the Laboratory
Round bale silage quality is determined almost entirely by the decisions made during the 48–72 hours from mowing to wrapping. The fermentation science is reliable and predictable — give the lactic acid bacteria the moisture, sugar, and anaerobic environment they need, and they will produce high-quality silage from almost any grass or legume crop. Deny them any one of those conditions, and no amount of inoculant, film layers, or careful storage will recover the lost fermentation.
The practical disciplines that produce consistently good silage — cutting at the right growth stage, wilting to the target moisture range, baling at maximum density with net wrap, wrapping within two hours, applying adequate film layers, storing on well-drained ground, protecting against bird puncture, and feeding out promptly once opened — are all within the reach of any farm operator with a suitable baler and wrapper. The investment is in attention to detail at each step, not in expensive technology.
Round Balers for Silage Production — Factory Direct from Balershay
We supply round balers suited to silage production across the full tractor power range — from compact 25–50 hp models for small farms to high-throughput machines for large silage operations — with net wrap systems and full technical support. Visit balershay.com to explore our baler range, or contact our team to match the right machine to your silage operation.